Heater core — removal and installation Ford F150
Warning: The vehicles covered by this manual are equipped with a Supplemental Restraint System (SRS), more commonly known as airbags. Always disable the airbag system before working in the vicinity of any airbag system components to avoid the possibility of accidental deployment of the airbag, which could cause personal injury (see Chassis electrical system).
Note: The heater and evaporator cores are mounted in a large housing under the instrument panel. The instrument panel must be removed for access to the housing, and this is a difficult procedure for the home mechanic, involving many hard-to-find/reach fasteners and electrical connectors.
Removal
1. Have the air conditioning system discharged by a licensed air conditioning technician.
2. Drain the cooling system (see Tune-up and routine maintenance).
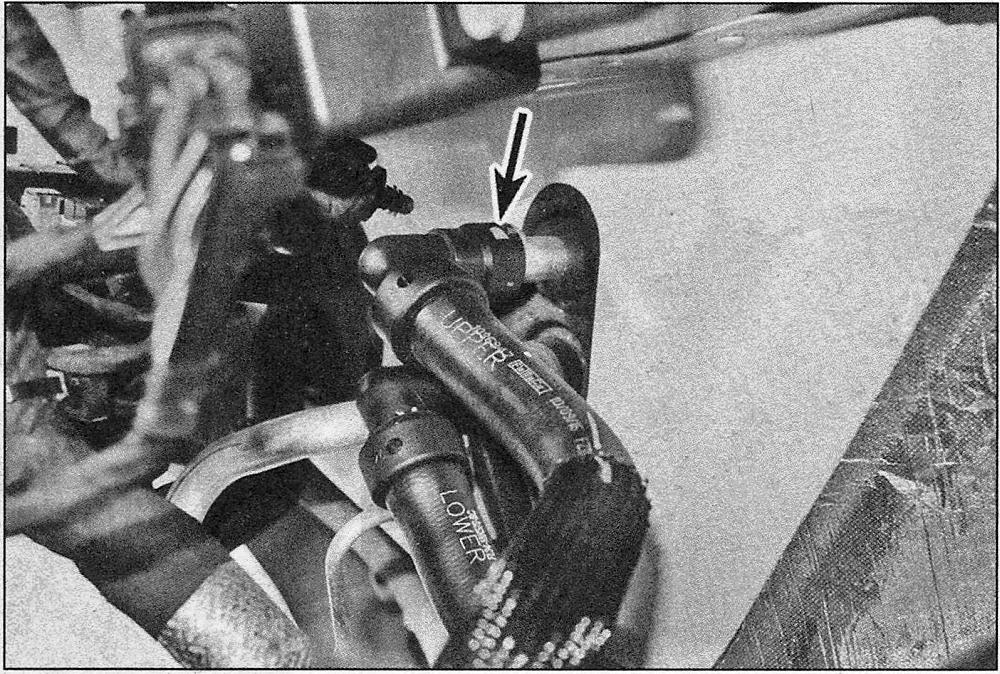
Press the plastic tabs on the heater hose fittings to release the heater hoses
3. Detach the heater hoses from the heater core pipes on the engine compartment side of the firewall (see illustration). Plug the heater core pipes to prevent leakage when the HVAC housing is removed.
Refrigerant line manifold nut at the TXV (A) and HVAC housing mounting nut (B)
4. Remove the nut and detach the refrigerant lines from the Thermostatic Expansion Valve (TXV) at the firewall (see illustration). Plug the lines and ports. Also remove the HVAC housing nut accessible from the engine compartment side of the firewall.
5. Remove the instrument panel (see Body).
6. Detach all electrical connectors and wiring harness clips from the HVAC housing.
HVAC housing-to-firewall nut locations
7. Unscrew the nuts securing the HVAC housing to the firewall and remove the HVAC housing from the passenger compartment (see illustration).
Note: It’s a good idea to cover the floor with plastic sheeting in case some coolant leaks out of the heater core when the HVAC housing is removed. Note: On models with a duct that leads to the rear seating area, detach the HVAC housing from the firewall and tilt the top to the rear do detach it from the duct.
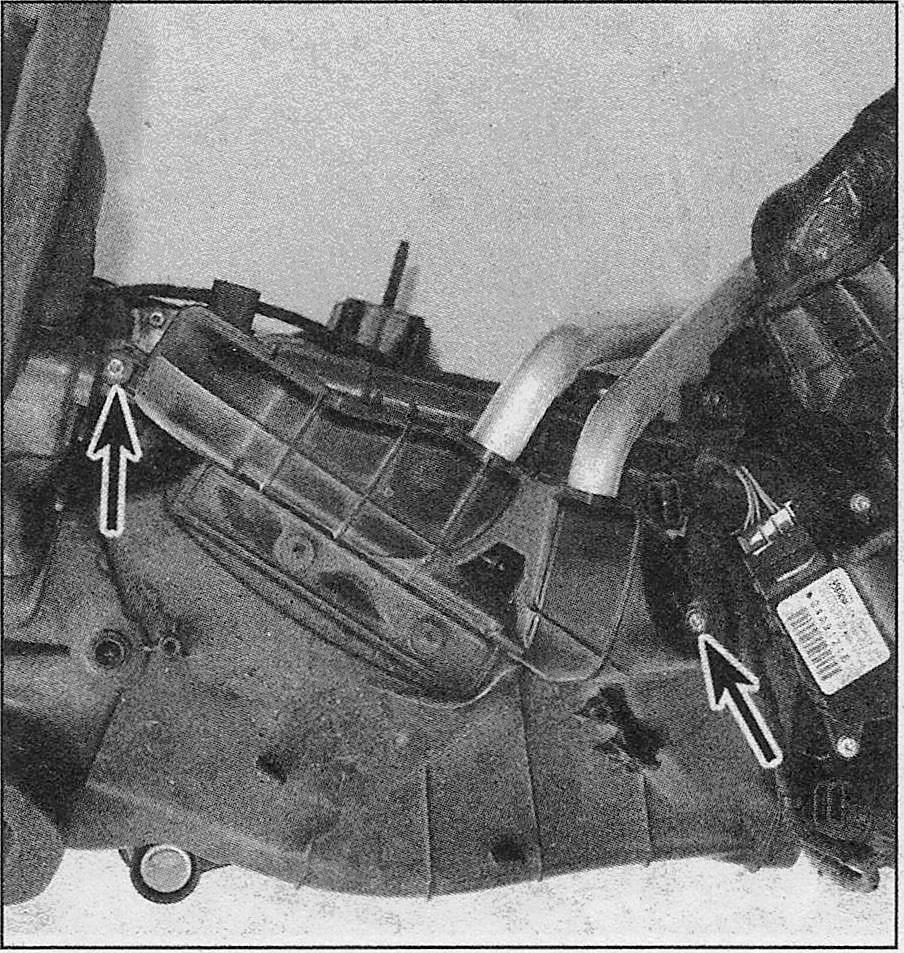
Remove the heater core cover screws…
… then separate the cover from the case — heater/evaporator case removed for clarity
8. Remove the heater core cover screws and cover (see illustrations).
Use a small screwdriver to pry up the clip lock, then remove the clip…
… and separate the tubes from the heater core
9. Disconnect the heater core tube clips at the heater core and disconnect the tubes from the heater core (see illustrations). Always replace the 0-ring and clips with new ones.
Lift the heater core out of the case and replace the 0-rings on the heater core tubes
10. Remove the heater core from the case (see illustration).
Installation
11. Installation is the reverse of removal, noting for the following:
- Replace the heater core tube 0-rings and the tube clips with new ones.
- Fill the cooling system with the correct type and amount of coolant (see Tune-up and routine maintenance).
- Start the engine and check for leaks.
- Have the air conditioning system recharged by the shop that discharged it.


