Door trim panels — removal and installation Ford F150
Front door trim panel
1. Remove the door sail panel then remove the upper mounting screw (see illustration).
.1 Remove the door panel upper mounting screw
2. Pry-out and remove the trim cover, then remove then panel retaining screws under the inside door handle (see illustrations).
.2a Pry the fastener cover out using a trim tool…
.2b. ..then remove the retaining screws
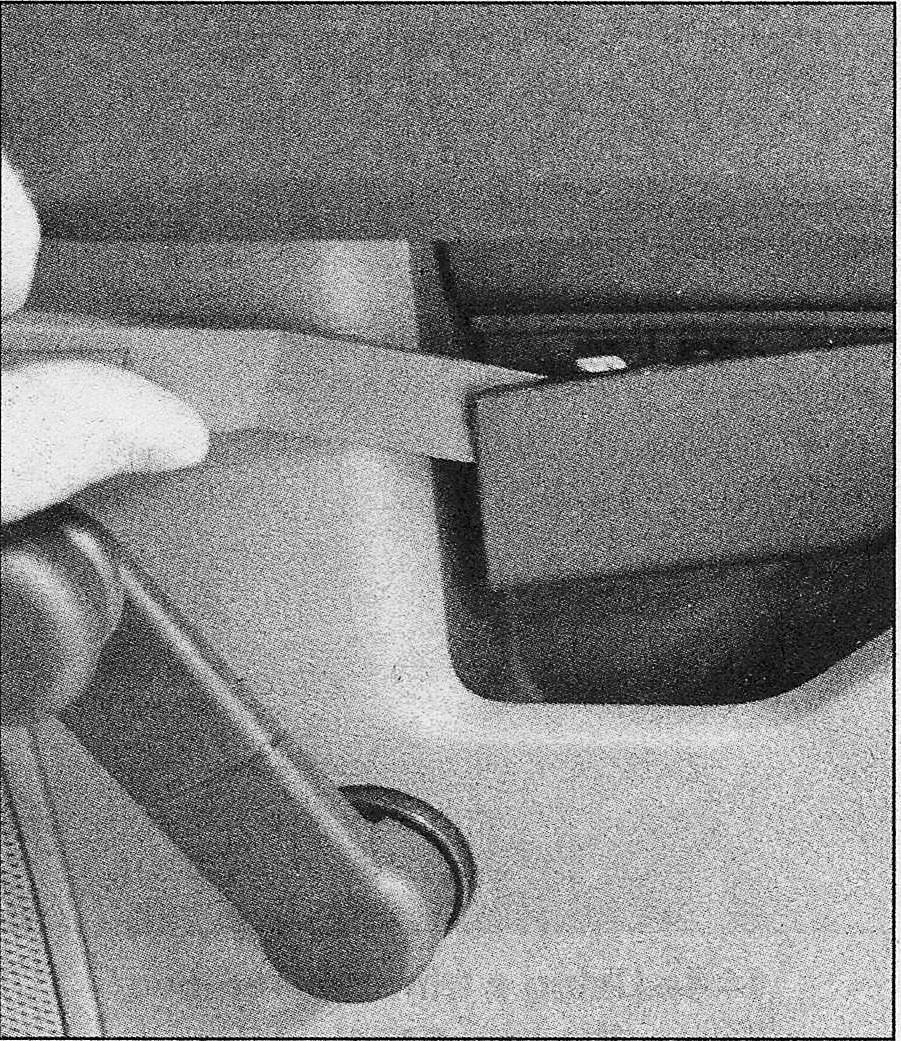
3. Pry the inside door handle trim off (see illustrations).
.3a Use a trim tool to separate the front of the handle cover. ..
.3b…and remove the cover
4. Remove the door panel fasteners (see illustrations).
.4 Remove the door trim panel fasteners that are exposed when the handle is removed
5. Remove the door trim panel lower mounting fasteners (see illustration).
.5 Lower trim panel fastener locations
6. On manual window equipped models, use a screwdriver to separate to the window handle cover, then remove the window handle fastener (see illustrations).
.6a Use a screwdriver to separate to the window handle cover…
.6b …then remove the window handle mounting screw (Torx head
7. Use a trim tool to disengage the door panel clips (see illustration), then raise the trim panel up and off of the door. Also disconnect any wiring harness connectors.
.7 Disengage the fasteners along the outer edge of the panel
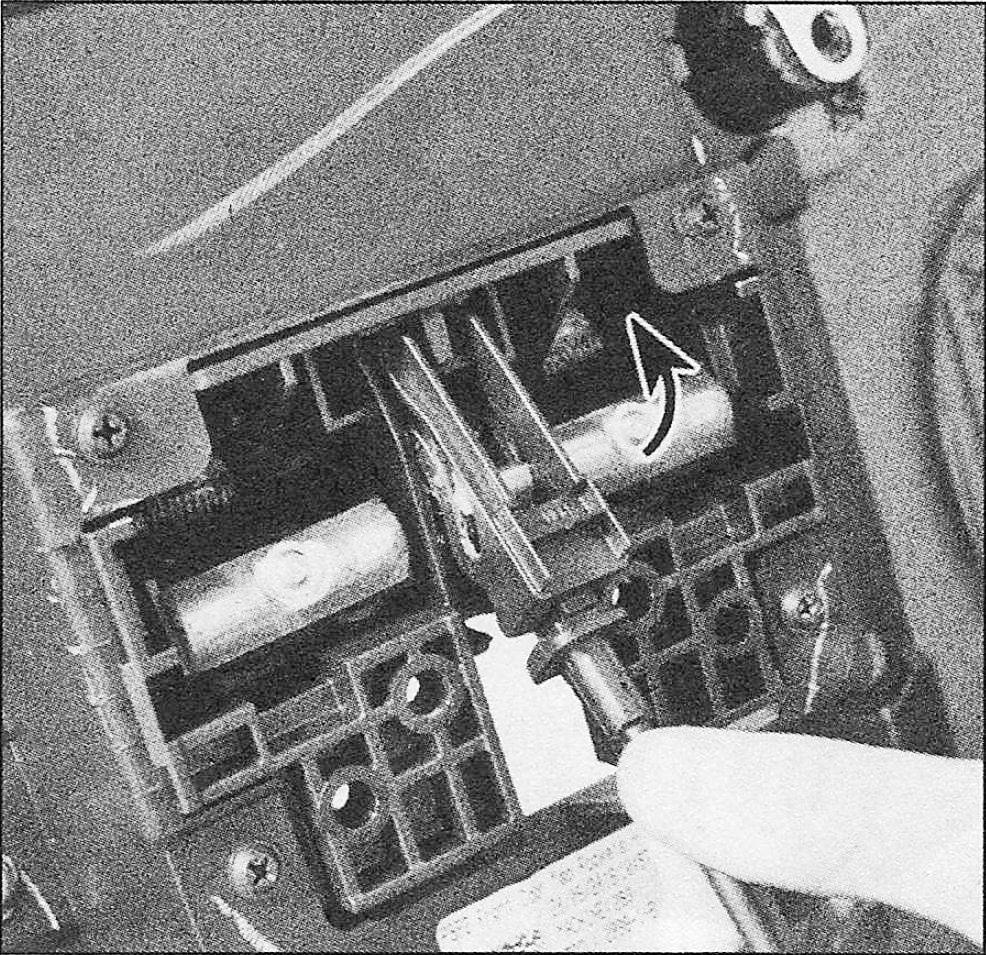
8. Disconnect the latch cable and remove the door trim panel (see illustration).
.8 Disconnect the latch cable from the trim panel by pivoting it outward
9. For access to the inside door components, carefully peel back and remove the plastic watershield.
10. Installation is the reverse of removal.
Rear door trim panel (SuperCab and SuperCrew models)
11. Pry-off the small trim cover and remove the seat belt upper anchor bolt.
12. Pry-off and remove the door pillar trim covers.
13. Remove the inside door handle trim cover, then retaining bolts.
14. If equipped, pry-off the trim cover located underneath the grab handle, then remove the exposed panel bolts.
15. Pry-off the door grab handle trim cover, then remove the exposed bolts.
16. Remove the door trim panel lower retaining bolts.
17. If necessary on models equipped with manual crank windows, remove the rear window crank as described in Step 6.
18. Use a trim tool to disengage the clips on the outer edge of the panel, then pull the panel up and off of the door.
19. Disconnect any wiring harness connectors. Disconnect the door latch cable as described in Step 8, then remove the rear door trim panel from the vehicle.
20. For access to the inside door components, carefully peel back and remove the plastic watershield.
21. Installation is the reverse of removal.


