Master cylinder — removal and installation Ford F150
Removal
1. The master cylinder is located in the engine compartment, mounted to the power brake booster.
2. Using a large syringe or equivalent, siphon the brake fluid from the master cylinder reservoir and dispose of it properly. Caution: Brake fluid will damage paint. Cover all painted surfaces and avoid spilling fluid during this procedure. If fluid is spilled, rinse it off with plenty of water.
3. Disconnect the electrical connector from the fluid level warning switch (see illustration).
2. Brake line fittings
3. Fluid level warning switch connector
4. Fluid reservoir

4. On 4WD models, disconnect the front axle vent tube retainer from the master cylinder mounting stud on the brake booster.
5. Place rags under the fluid fittings and prepare brake hose caps or a plastic bag to cover the ends of the lines once they are disconnected. Loosen the fittings at the ends of the brake lines where they enter the master cylinder. To prevent rounding off the corners on these nuts, use a flare-nut wrench, which wraps around the nut. Pull the brake lines slightly away from the master cylinder and plug the holes with the brake line caps or wrap the master cylinder in the plastic bag to prevent contamination and spills.
6. Remove the nuts attaching the master cylinder to the power booster. Pull the master cylinder off the studs and out of the engine compartment. Again, be careful not to spill the fluid as this is done.
7. If a new master cylinder is being installed and is not equipped with a reservoir, transfer the reservoir from the old master cylinder to the new one using new seals. Remove the reservoir retaining pins and carefully pry the reservoir away from the old master cylinder.
Use clean brake fluid to ease installation of the new seals and reservoir.
Caution: Old brake fluid that has been opened and left on a shelf for a long period of time should not be used. Purchase new brake fluid instead. Brake fluid is hygroscopic and will absorb moisture from the air. If the brake fluid was left opened or unsealed, or is over a year old, it should be disposed of properly; it is unsafe for use.
Installation
8. Bench bleed the new master cylinder before installing it. Mount the master cylinder in a vise, with the jaws of the vise clamping on the mounting flange.
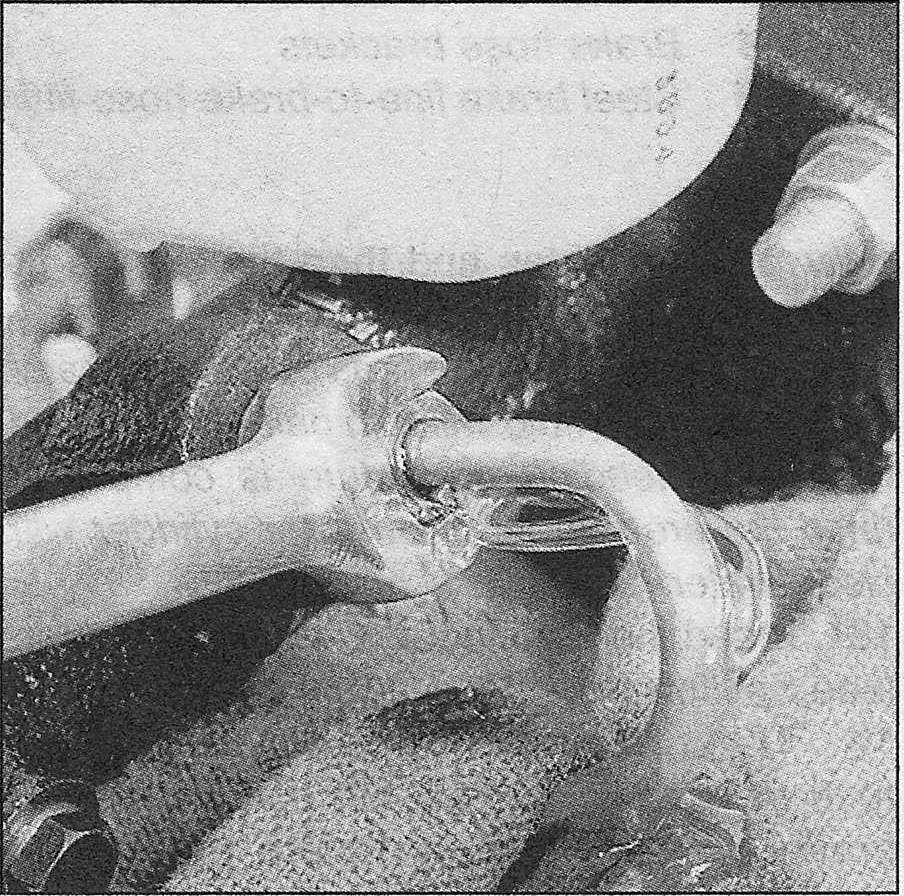
9. Attach a pair of master cylinder bleeder tubes to the outlet ports of the master cylinder (see illustration).
9.9 The best way to bleed air from the master cylinder before installing it on the vehicle is with a pair of bleeder tubes that direct brake fluid into the reservoir during bleeding
10. Fill the reservoir with brake fluid of the recommended type (Tune-up and routine maintenance).
11. Slowly push the pistons into the master cylinder (a large Phillips screwdriver can be used for this) — air will be expelled from the pressure chambers and into the reservoir. Because the tubes are submerged in fluid, air can’t be drawn back into the master cylinder when you release the pistons.
Note: When bench bleeding, it’s always best to find clear hoses for the brake lines. This way you’ll be able to see the smaller bubbles as they leave the master cylinder and travel slowly up the tubing. Wait for the small bubbles to reach the end of the tubing before releasing the master cylinder piston.
12. Repeat the procedure until no more air bubbles are present.
13. Remove the bleed tubes, one at a time, and install plugs in the open ports to prevent fluid leakage and air from entering. Install the reservoir cap.
14. Install the master cylinder over the studs on the power brake booster and tighten the attaching nuts only finger-tight at this time (see illustration).
9.14 Be sure to install a new rubber 0-ring on the master cylinder (typical shown)
Note: Be sure to install a new 0-ring into the sleeve of the master cylinder
15. Thread the brake line fittings into the master cylinder. Since the master cylinder is still a bit loose, it can be moved slightly in order for the fittings to thread in easily. Be careful not to cross-thread or strip the fittings as they are installed.
16. Fully tighten the mounting nuts, then the brake line fittings. Tighten the nuts to the torque listed in this Chapter’s Specifications.
17. Fill the master cylinder reservoir with fluid, then bleed the master cylinder and the brake system as described in Brake hydraulic system – bleeding. To bleed the cylinder on the vehicle, have an assistant depress the brake pedal and hold the pedal to the floor. Loosen the fitting just enough to allow air and fluid to escape then tighten it lightly (see illustration). Repeat this procedure on both fittings until the fluid is clear of air bubbles and then tighten the fittings securely.
9.17 Have an assistant depress the brake pedal and hold it down, then loosen the fitting nut, allowing the air and fluid to escape; repeat this procedure on both fittings until the fluid is clear of air bubbles
Caution: Have plenty of rags on hand to catch the fluid — brake fluid will ruin painted surfaces. After the bleeding procedure is completed, rinse the area under the master cylinder with clean water.
18. Bleed the remainder of the brake system (see Brake hydraulic system – bleeding).
19. The remainder of installation is the reverse of removal. Test the operation of the brake system carefully before placing the vehicle into normal service.
Warning: If you are in doubt about the effectiveness of the brake system, or the BRAKE or ABS light is on, DO NOT OPERATE THE VEHICLE. Have the vehicle towed to a dealer service department or qualified independent repair shop for further testing.


