Key fob — programming, battery replacement, key fob strength testing/driver’s door keypad — removal and installation Ford F150
Key fob — programming
Note: This procedure is for the RKE (Remote Key Entry) type key fobs and not for the IKT (Integrated Key Transmitter) type. The IKT is automatically programmed when the PATS (Passive Anti-Theft System) is programmed. Note: IKT transmitters can only be programmed with a scan tool. Two working keys are required.
Note: When programming the RKE transmitter ALL remotes must be present and in working order.
1. Programming can be done with a scanner or with the following procedure.
Caution: DO NOT touch the brake pedal when programming the RKE or this will end the program procedure.
2. Using the door lock switch on either door, cycle the locks to the Unlock position.
3. Rapidly cycle the ignition key from Off to On 8 times within 10 seconds ending with the 8th time in the On position. If successful, the door locks will Lock and Unlock once.
4. Within 20 seconds, press any button on the RKE transmitter that is being programmed to the vehicle.
5. The doors should Lock and then Unlock to confirm the programming was successful.
6. Repeat the same procedure of pressing any button on the next remote to be programmed up to a maximum of four remotes. Each time a successful programming of the next remote is accepted, the door locks will Lock and Unlock.
7. To end the programming session, turn the key to Off. The session will automatically end when a maximum of four RKE fobs are programmed, or 20 seconds have passed without any RF input from the remote(s).
Key fob — battery replacement
8. Use a thin coin or small flat bladed screwdriver to separate the two halves of the key fob (see illustration).
.8 Gently pry the two halves of the fob apart
9. Check that the polarity is correct, then remove the old battery (see illustration).
.9 Observe the battery polarity (+I- sign), then remove the battery
10. Use the correct battery (Battery number CR2032).
11. Replace the battery and check operation of the remote. If needed, reprogram the remote.
Key fob — strength testing
12. The key fob remote has an operating distance of 30 feet. Each time a button on the fob is pushed a signal is received by the TPMS (Tire Pressure Monitor System). This signal is then passed onto the BCM (Body Control Module) where it is then processed to unlock or lock the doors.
Note: A quick check tell the strength (and battery condition) of a key fob remote is to take your remotes to a tire shop or repair facility that has a TPMS scanning tool. Every TPMS scan tool has a feature for determining the strength of the key fob output. By holding down any button the scan tool will display the strength.
13. The fob battery can be checked with an volt meter after it has been removed from the key fob. It should have 2.5 volts.
14. If for some reason your key fob fails to operate even after you’ve tried a replacement battery, take your key fob to a repair shop that has a tire monitor reset tool. Most of these tools have an RF strength indicator test as part of their diagnostics features. The technician can check whether or not your key fob is in working order or not. If there is no RF signal, the key fob is more than likely faulty. If the signal is weak, chances are the battery needs to be replaced.
Driver’s door key pad — removal and installation
15. Remove the driver’s door panel (see Body).
16. Raise the window to the fully closed position.
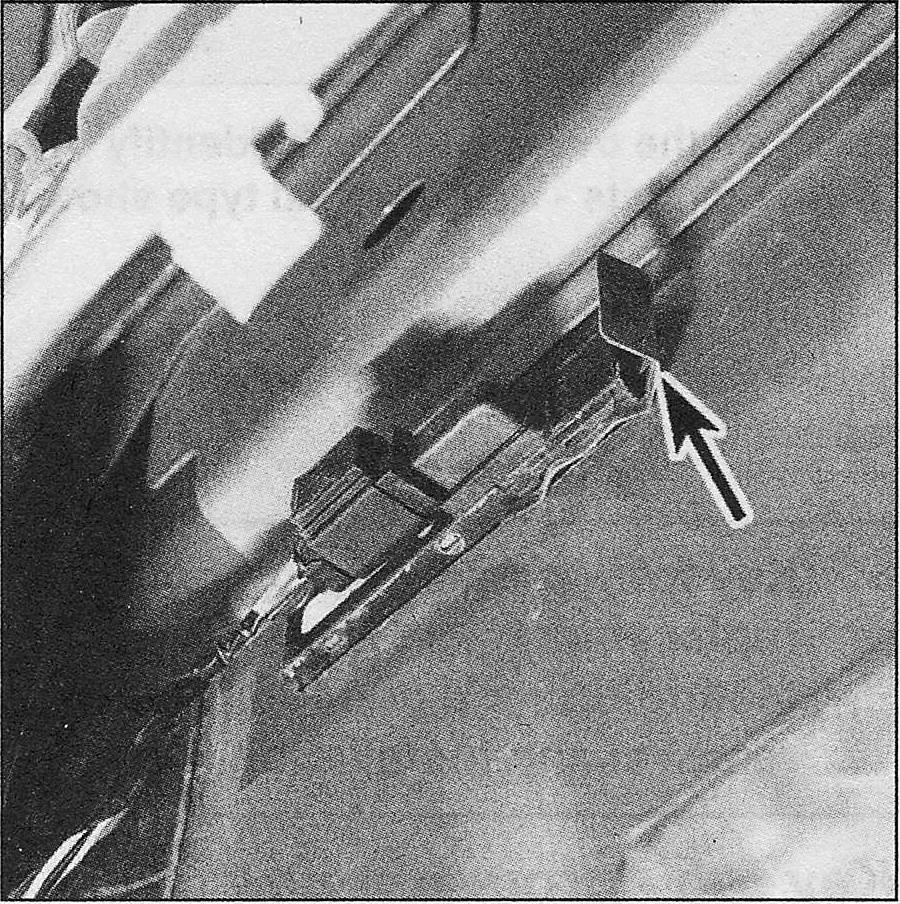
17. Pull the retainer clip toward the front of the door to remove it (see illustration).
.17 Pry the retainer clip forward to remove it
18. Slightly push the keypad module out of the door far enough to get your fingers behind it from the outside (see illustration).
6.18 Grasp the keypad module and remove it from the door, then disconnect the electrical connector
19. Leave the connector to hang outside of the door so that it doesn’t fall back inside.
20. Installation is the reverse of removal.


