Battery cables and sensors — replacement Ford F150
Battery cables
1. When removing the cables, always disconnect the cable(s) from the negative battery terminal first and hook it up last, or you might accidentally short out the battery with the tool you’re using to loosen the cable clamps. Even if you’re only replacing a cable for the positive terminal, be sure to disconnect the negative cable(s) from the battery first.
2. Disconnect the old cables from the battery or the mega-fuse terminal, then trace each of them to their opposite ends and disconnect them. Be sure to note the routing of each cable before disconnecting it to ensure correct installation.
3. If you are replacing any of the old cables, take them with you when buying new cables. It is vitally important that you replace the cables with identical parts.
4. Clean the threads of the solenoid or ground connection with a wire brush to remove rust and corrosion. Apply a light coat of battery terminal corrosion inhibitor or petroleum jelly to the threads to prevent future corrosion.
5. Attach the cable to the solenoid or ground connection and tighten the mounting nut/bolt securely.
6. Before connecting a new cable to the battery, make sure that it reaches the battery post without having to be stretched.
7. Connect the cable to the positive battery terminal first, then connect the ground cable to the negative battery terminal.
Battery sensors
Battery current sensor
Note: The battery current sensor is attached to the negative battery cable near the battery. Not all models are equipped with this sensor.
8. Remove the nut attaching the negative battery cable to the terminal and disconnect both cables from the stud.
9. Detach the sensor from the battery tray.
10. Note the positioning of the battery current sensor. Mark the cable for correct installation of the new sensor.
11. Disconnect the battery current sensor electrical connector.
12. Remove the tape securing the sensor to the cable and remove the sensor by sliding it up and off of the cable.
13. Installation is reverse of removal. Orient the sensor on the cable using the reference mark and apply electrical tape to secure.
Alternator current sensor
Note: The alternator current sensor is attached to the alternator B+ cable near the underhood junction box.
14. Disconnect the negative battery terminal (see Battery – disconnection and reconnection).
Detach the cover from the junction box to the rear of the battery
15. Remove the terminal cover from the side of the underhood junction box.
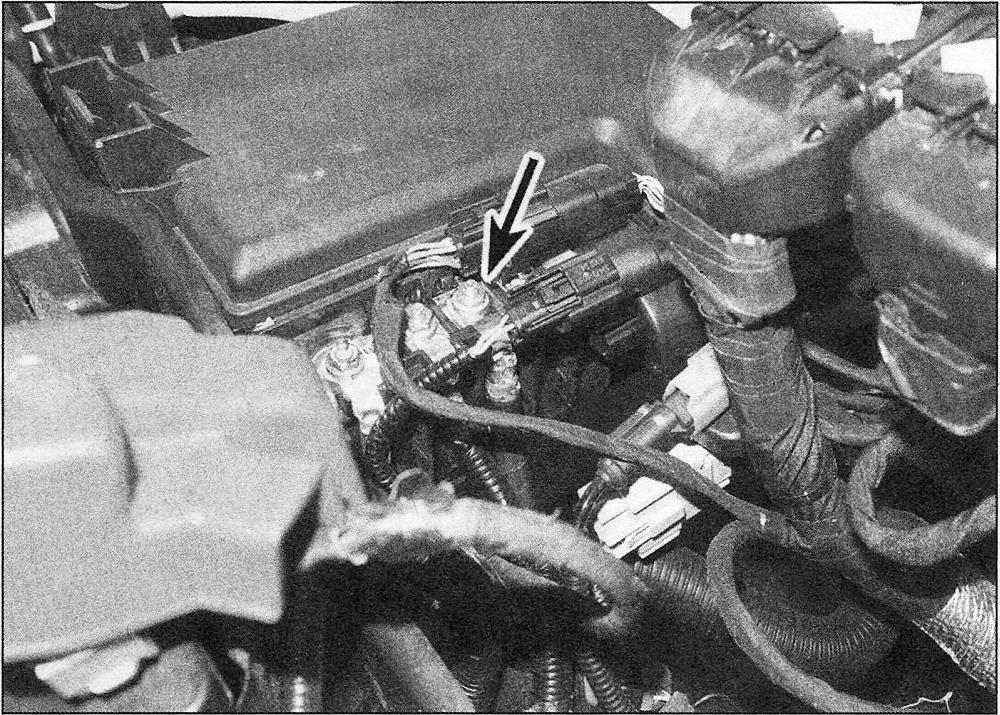
Alternator B+ cable retaining nut
16. Locate the alternator B+ cable. Remove the nut and disconnect the cable from the stud
17. Note the positioning of the alternator current sensor. Mark the cable for correct installation of the new sensor.
Alternator current sensor electrical connector (A) and sensor (B)
18. Disconnect the alternator current sensor electrical connector
19. Remove the tape securing the sensor to the cable and remove the sensor by sliding it up and off of the cable.
20. Installation is reverse of removal. Orient the sensor on the cable using the reference mark and apply electrical tape to secure.
Battery monitoring sensor
Note: The battery monitoring sensor is part of the negative battery terminal clamp and is replaced as a unit.
21. Disconnect the negative cable from the battery.
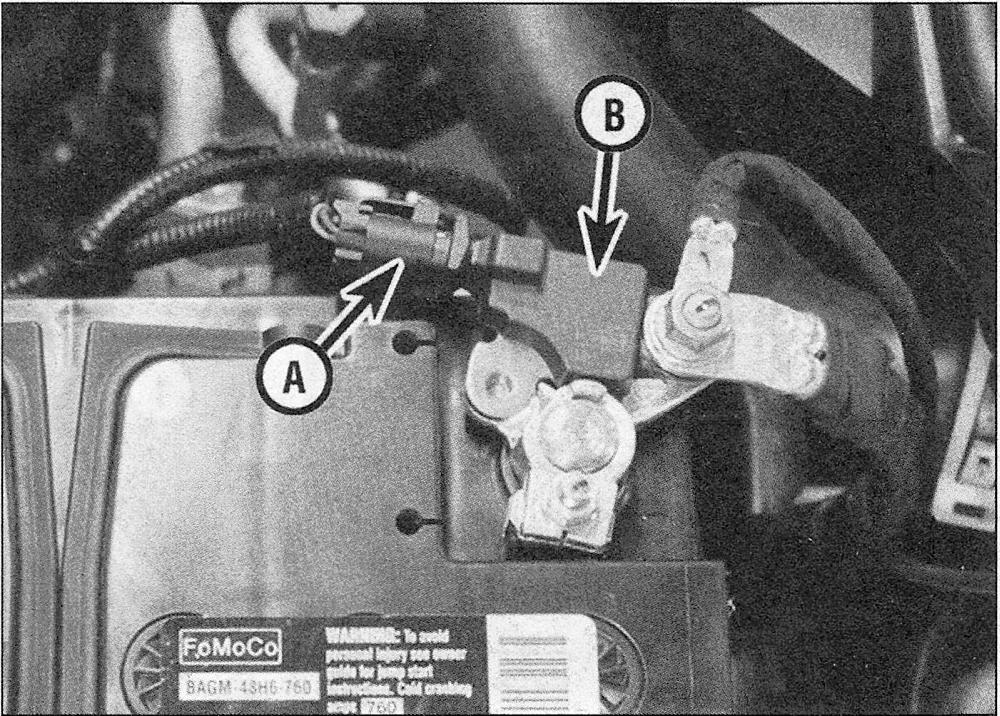
Battery monitoring sensor electrical connector (A) and sensor (B)
22. Disconnect the battery monitoring sensor electrical connector
23. Remove the nut and detach the negative battery cables from the negative terminal clamp.
24. Installation is reverse of removal.


