Exhaust manifolds — removal and installation Ford F150
Removal
Note: On 2.7L engines, the exhaust manifold is integrated into the cylinder head and and the turbochargers bolt directly to the cylinder heads.
1. Disconnect the cable from the negative battery terminal (see Battery – disconnection and reconnection)
2. Loosen the lug nuts on the manifold side you’re working on. Raise the vehicle and support it securely on jackstands then remove the wheel.
3. Also remove the inner fender splash shield (see Body).
4. On 3.5L turbocharged engines, remove the turbocharger from the manifold you’re working on (see Fuel and exhaust systems).
5. As a precaution, disconnect the oxygen sensor electrical connectors (see Emissions and engine control systems).
6. On 3.3L and 3.5L non-turbocharged engines, working under the vehicle, apply penetrating oil to the exhaust Y-pipe-tomanifold studs and nuts (they’re usually rusty).
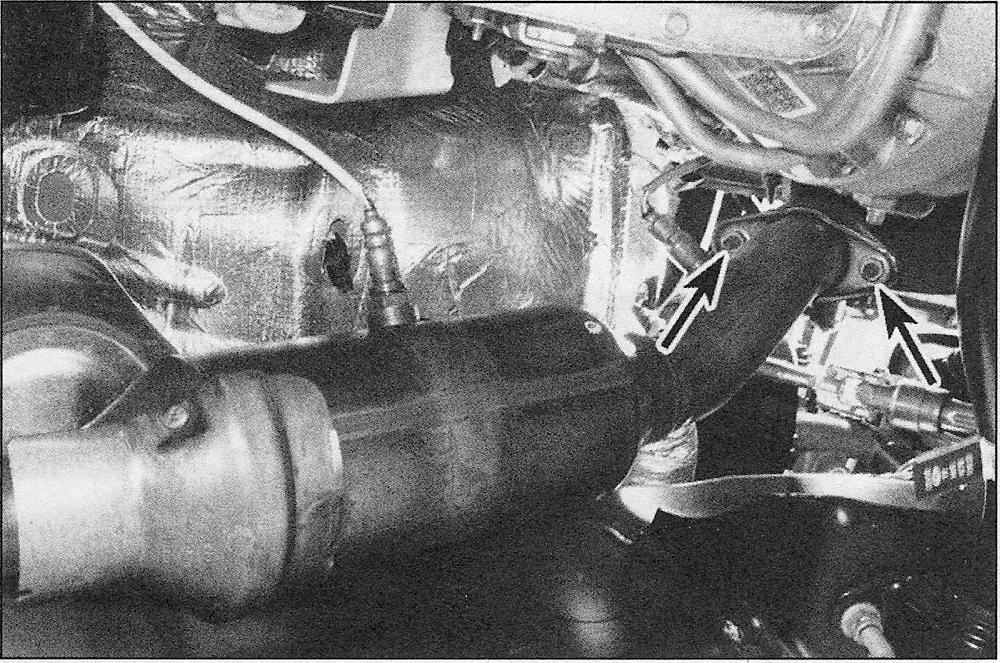
From below, remove the two catalytic converter-to-exhaust manifolds (left side shown, right side similar)
7. On 3.3L and 3.5L non-turbocharged engines, remove the nuts holding the catalytic converter-to-exhaust manifolds.
8. On 2.7L engines, remove the two bolts and remove the exhaust manifold heat shield.
9. Remove the manifold mounting nuts and detach the manifold from the cylinder head.
10. Remove the exhaust gaskets and clean the gasket surfaces on the manifold and cylinder heads.
Installation
Note: The manufacturer recommends removing the exhaust mounting studs from the cylinder heads and installing new studs.
11. Check the exhaust manifold for cracks and make sure all the stud threads are clean and undamaged. The exhaust manifold and cylinder head mating surfaces must be clean before the manifolds are reinstalled.
12. Position the exhaust manifold and new gasket over the studs on the cylinder head and install the mounting nuts.
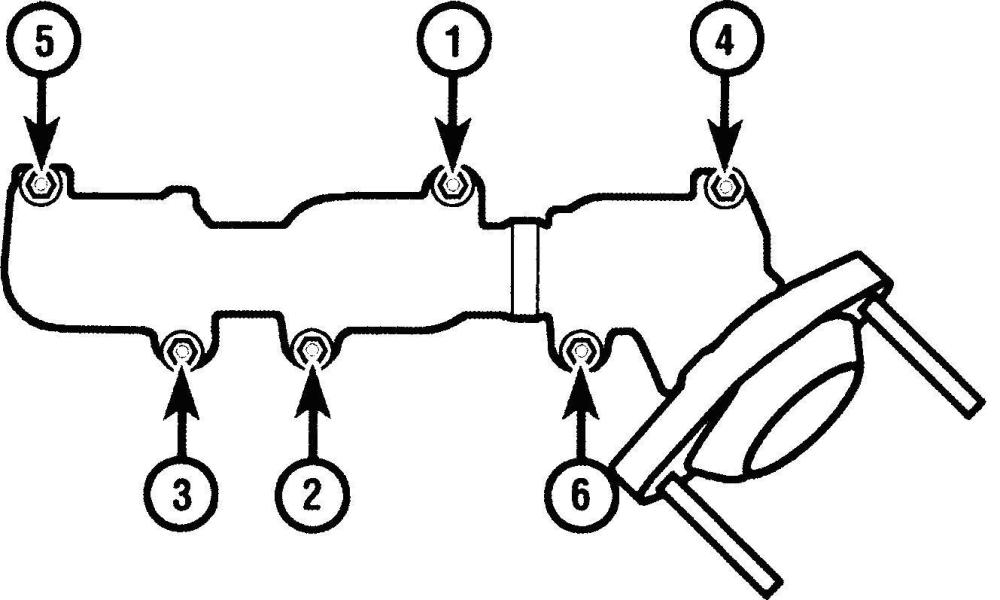
3.3L and 3.5L non-turbocharged engine manifold tightening sequence
3.5L turbocharged engine manifold tightening sequence
13. Tighten the nuts in sequence to the torque listed in this Chapter’s Specifications is reached.
14. The remaining installation steps are the reverse of removal.
15. Start the engine and check for exhaust leaks.


